Ready to transform your documents with elegant embossing? Whether you're enhancing stationery, certificates, or special projects, mastering the use of an embosser is key.
In this comprehensive guide, we'll walk you through the step-by-step process of using an embosser, from assembling the die into the holder to making flawless imprints. Follow along, and you'll be embossing like a pro in no time.
How to Assemble the Die into the Die Holder
How to Insert the Die Holder into the Embosser
Using the Embosser to Make the Imprint

How to Assemble the Die into the Die Holder
To ensure a precise and secure assembly of your die into the die holder, follow these steps carefully. Make sure your work area is clean and free of dust to ensure maximum adhesion and accuracy during assembly.
Screenshots and video tutorial courtesy of Trodat
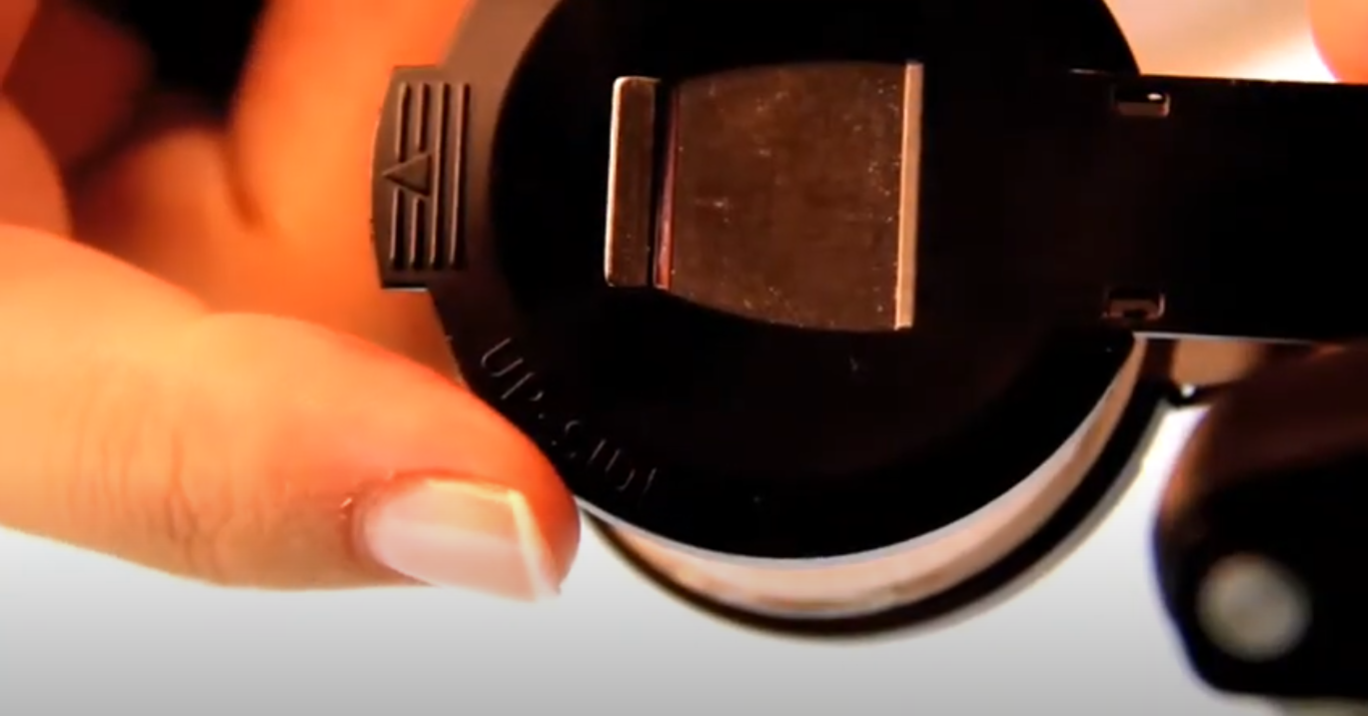
1. Identify the ‘UPSIDE’ Marking
Start by locating the side of the die holder labeled ‘UPSIDE’. This will help ensure proper orientation.

2. Flip the holder
Turn the holder over so the bottom side is now facing up. This will be the working surface for attaching the die.

3. Prepare the Adhesive Wafer
Take the two-sided adhesive wafer and peel off one side of the protective paper.

4. Apply the Adhesive to the Die
Flip the metal die over so the unengraved side is facing up. Apply the exposed adhesive side of the wafer to this surface.

5. Expose the Second Adhesive Surface
Grab the tab on the adhesive wafer and remove the remaining protective paper, exposing the second adhesive surface.

6. Position the Die
Rotate the die so the engraved side is properly oriented. Carefully place the die into the holder.

7. Secure the Die
Press down on the die to ensure it adheres firmly to the holder.

8. Remove the Paper Tab
On the bottom side of the die holder, grab the paper tab and peel it off to expose the adhesive.

9. Attach the Upper Portion of the Die
Take the upper portion of the die, flip it over, and align it directly with the bottom part. Rotate it until the two halves snap into place.

10. Press Firmly
Ensure the die is securely adhered by pressing the die holder together firmly.

11. Final Check
Your die holder is now assembled and ready to be inserted into your embosser.

How to Insert the Die Holder into the Embosser
For a smooth and secure fit, make sure the die holder is properly oriented and firmly clicked into place. Follow these steps to insert the die holder into your embosser:
1. Identify the Bottom Side of the Die Holder
Look for the markings that indicate the bottom side of the die holder. This will help ensure proper orientation.

2. Locate the Plastic Tabs
Notice the two plastic tabs at the top of the holder. These tabs are designed to prevent the holder from being inserted too far into the embosser.

3. Orient the Die Holder
Hold the die holder with the ‘UPSIDE’ indicator pointing up.

4. Insert the Die Holder
Squeeze the die holder as you gently insert it into the embosser. Continue to apply pressure until it clicks firmly into place.

5. Ready to Use
Your embosser is now ready to use. Ensure the die holder is securely in place before using your embosser.

Using the Embosser to Make the Imprint
Whether you're creating stationery, certificates, or other important papers, following the correct steps ensures a clean and precise imprint every time. Here's a simple guide to help you achieve the best results with your embosser.
1. Position the Paper
Place the sheet of paper flat on a hard surface. Align the embosser at the desired location on the paper, ensuring the area to be imprinted is correctly positioned.

2. Press the Embosser
Firmly press the handles of the embosser together, ensuring consistent pressure to create a clear, even imprint on the paper.

3. Check the Imprint
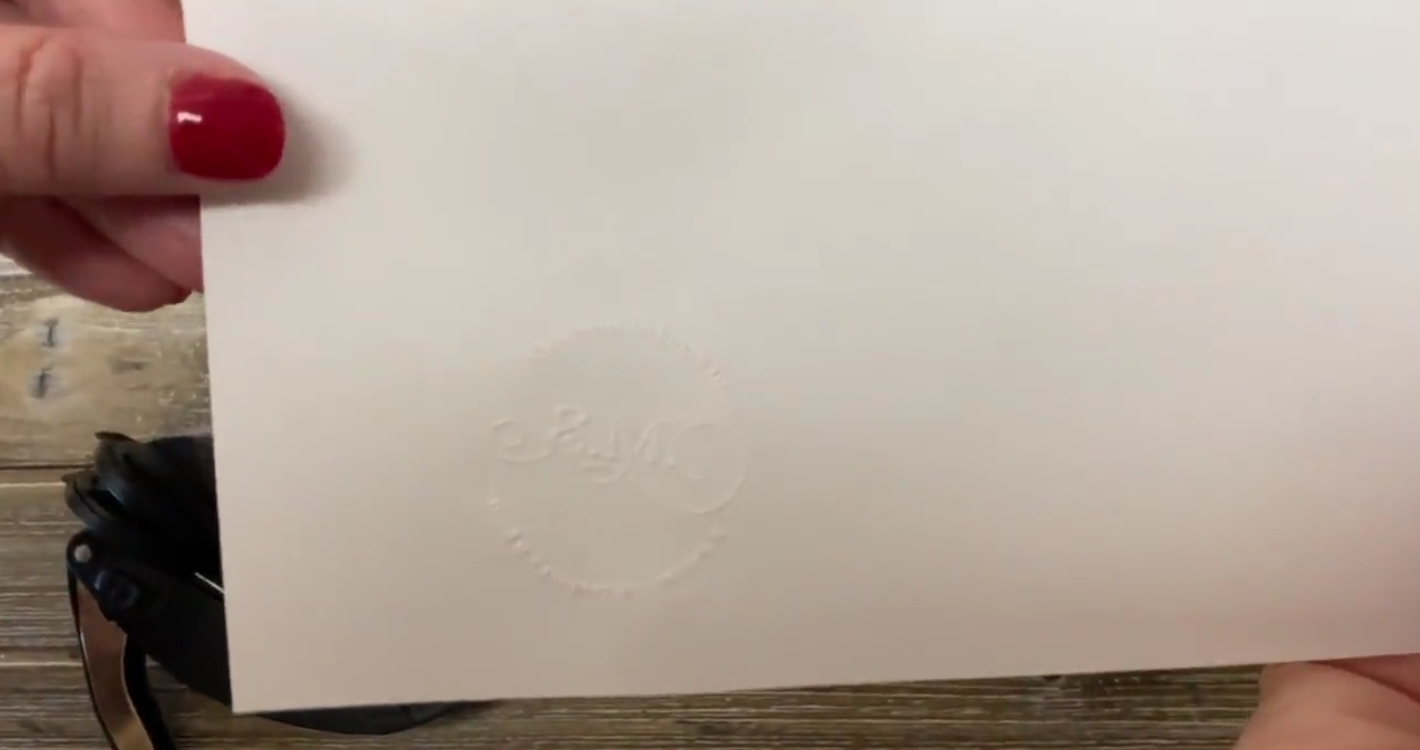
Carefully remove the paper from the embosser and check the imprint. Ensure the design is clear and fully transferred onto the paper.

Pro Tips for Perfect Embossing

- Choose the Right Paper: Opt for thicker, high-quality paper to achieve the best embossing results. Thinner papers can tear easily and may not hold the embossing well. Using heavyweight paper such as cardstock provides a sturdy base for a clean, raised impression.
- Practice First: Before working on your final document, practice embossing on some scrap paper. This allows you to gauge the correct pressure and alignment needed, helping you avoid errors on your important projects.
- Keep It Clean: Regularly clean your embosser to prevent dust and debris from affecting your imprints. Use a small, soft brush to clean the die and holder, ensuring no particles interfere with the embossing process.
- Align with Precision: Ensure the paper and die are perfectly aligned before pressing to avoid uneven or misaligned imprints. Taking the time to position the paper accurately ensures consistent and professional results.
- Apply Even Pressure: Press the handles of the embosser evenly to avoid partial or unclear imprints. Consistent pressure is crucial for maintaining the quality of each emboss. Adjust pressure settings if your embosser allows, depending on the paper type used.
- Proper Storage: Store your embosser in a cool, dry place when not in use to prevent adhesive degradation and die warping. Proper storage also protects your embosser from dust and damage, ensuring it remains in good working condition.
- One Sheet at a Time: Emboss one sheet at a time to ensure a crisp and clear imprint. Embossing multiple sheets at once can lead to poor results as the pressure is not distributed evenly.
- Use a Light Box: For intricate designs, using a light box can help you position your paper accurately over the die. This ensures precise alignment, which is crucial for detailed embossing work.
- Experiment with Papers: Try different types and weights of paper to see which works best for your project. Some papers may yield a more pronounced emboss, while others might offer a more subtle effect. Experimenting helps you find the perfect combination for your needs.
Images are courtesy of Trodat. Used under fair use for educational and illustrative purposes.


